A separate tool, on purpose
DocumentForge is a database. The management UI is a separate Next.js 15 app, kept out of the C# codebase deliberately so the database stays a clean library with no UI baggage. You run the UI when you want it, you don't when you don't, and it never gets between your application and your data.
Open-source, MIT-licensed, no telemetry. Speaks the same REST API any other client speaks, so you can register every node you operate — dev box, staging, prod, individual cluster shards, replication followers — and switch between them from the sidebar.
Studio — SSMS-style data explorer
If you've used SQL Server Management Studio, Studio will feel instantly familiar. A collapsible explorer tree on the left, a tabbed query workspace in the middle, results table beneath. Open as many query tabs as you need — each one is a separate scratchpad pinned to the connection you're on.
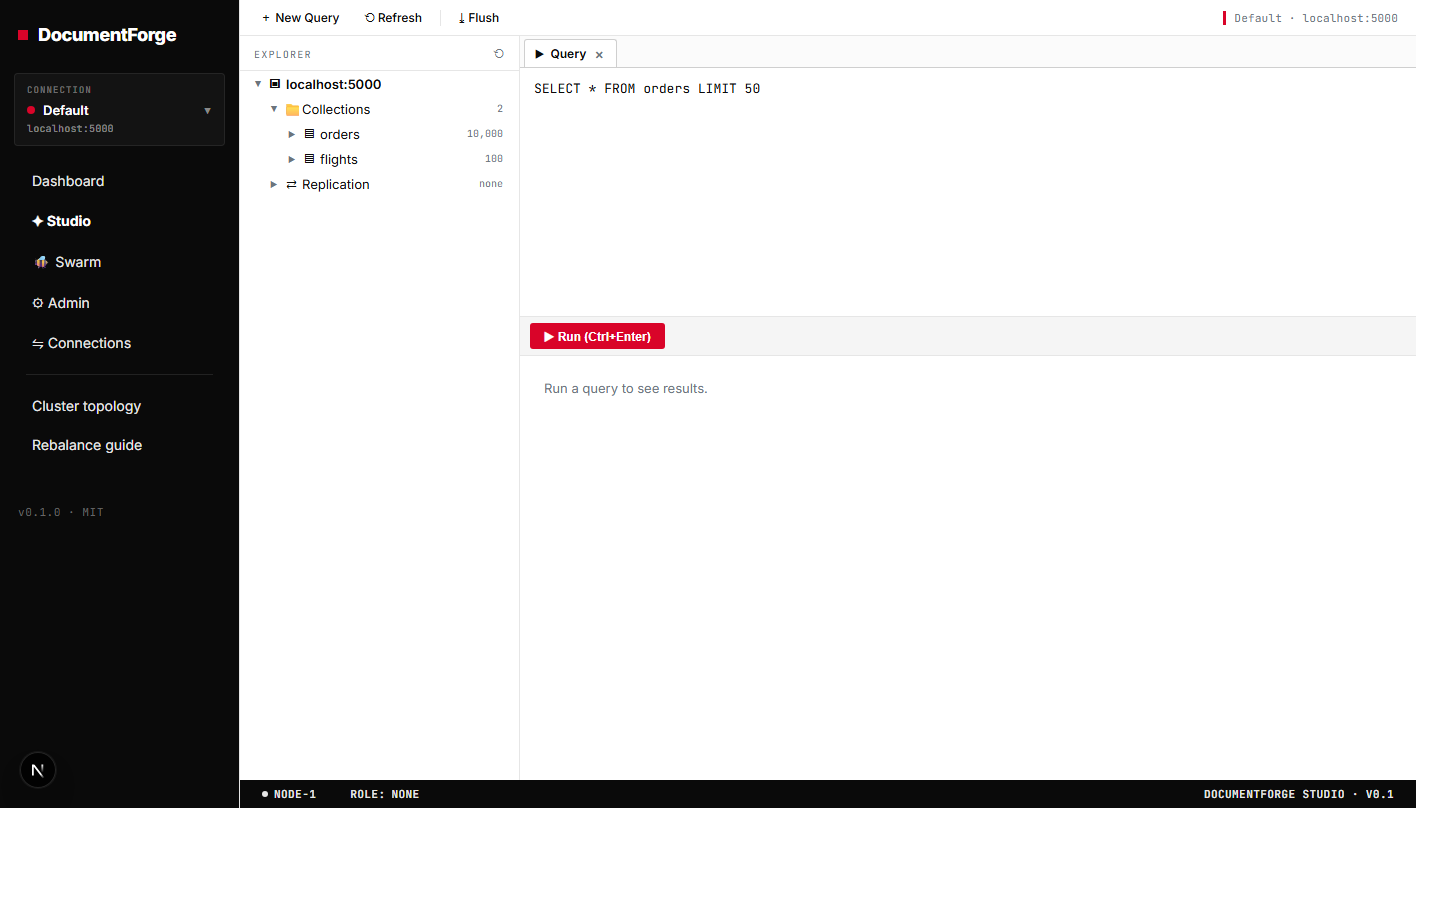
- Explorer tree — every connection → its databases → their collections, with document counts and index lists one click away. Click an index to jump to its detail view.
- Tabbed queries — keep a query for "find recent orders" open in one tab, "tax-rate sanity check" in another, "audit log search" in a third. Tabs survive between visits per connection.
- Run / Refresh / Flush / Checkpoint — every routine operation is a button at the top.
- Status bar — node ID, replication role, server version. Always-on awareness of what you're connected to.
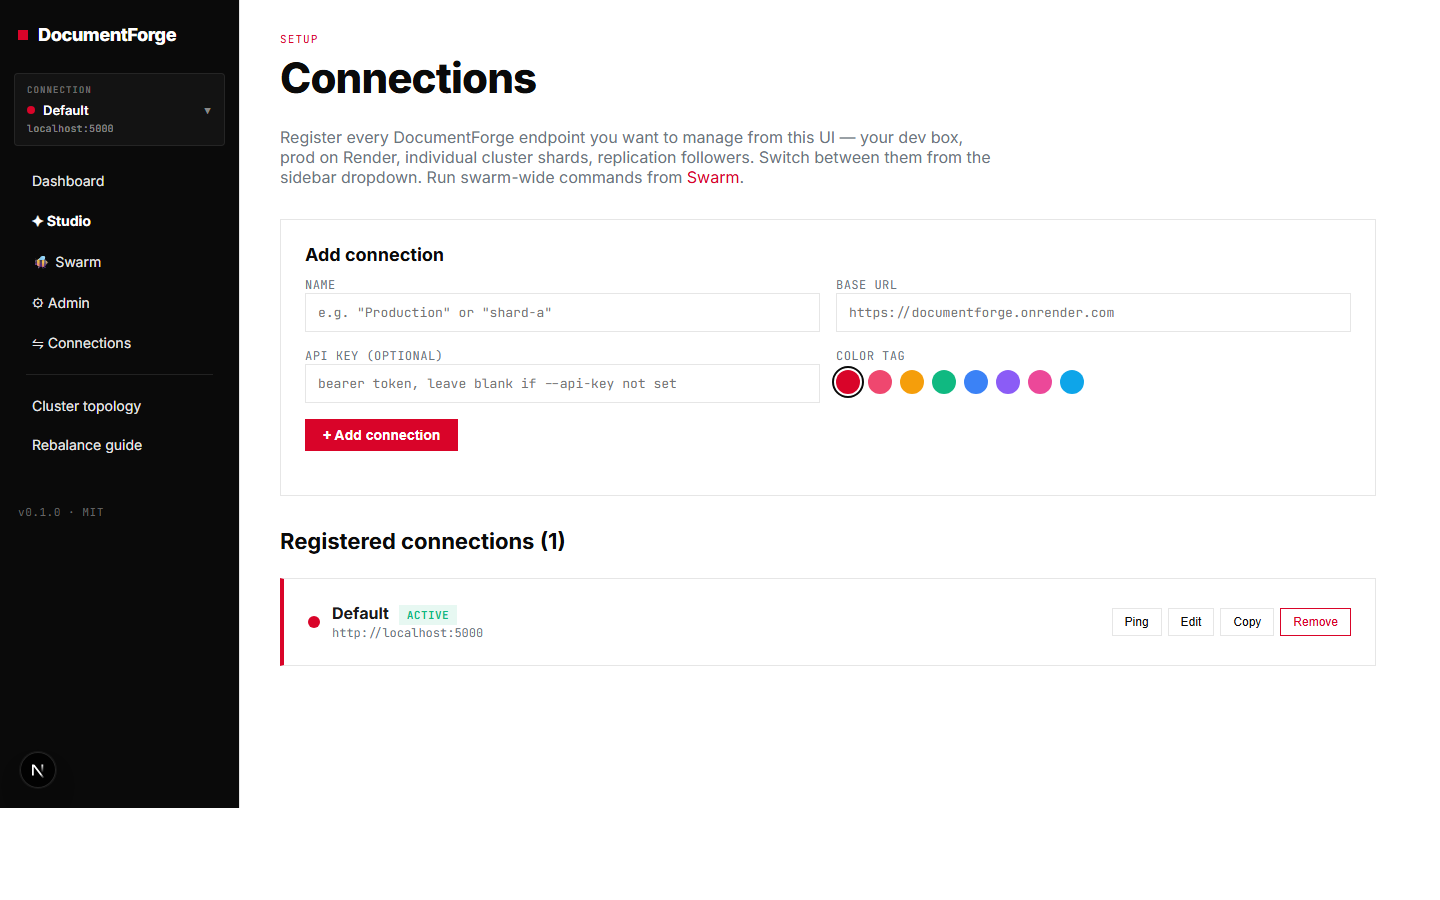
Connections — register every endpoint you operate
Add a connection for every DocumentForge endpoint that matters: dev box, staging, production-leader, production-followers, individual cluster shards. Each gets a name, a base URL, an optional bearer token, and a colour tag. Switch between them from the sidebar dropdown — the rest of the UI re-points instantly.
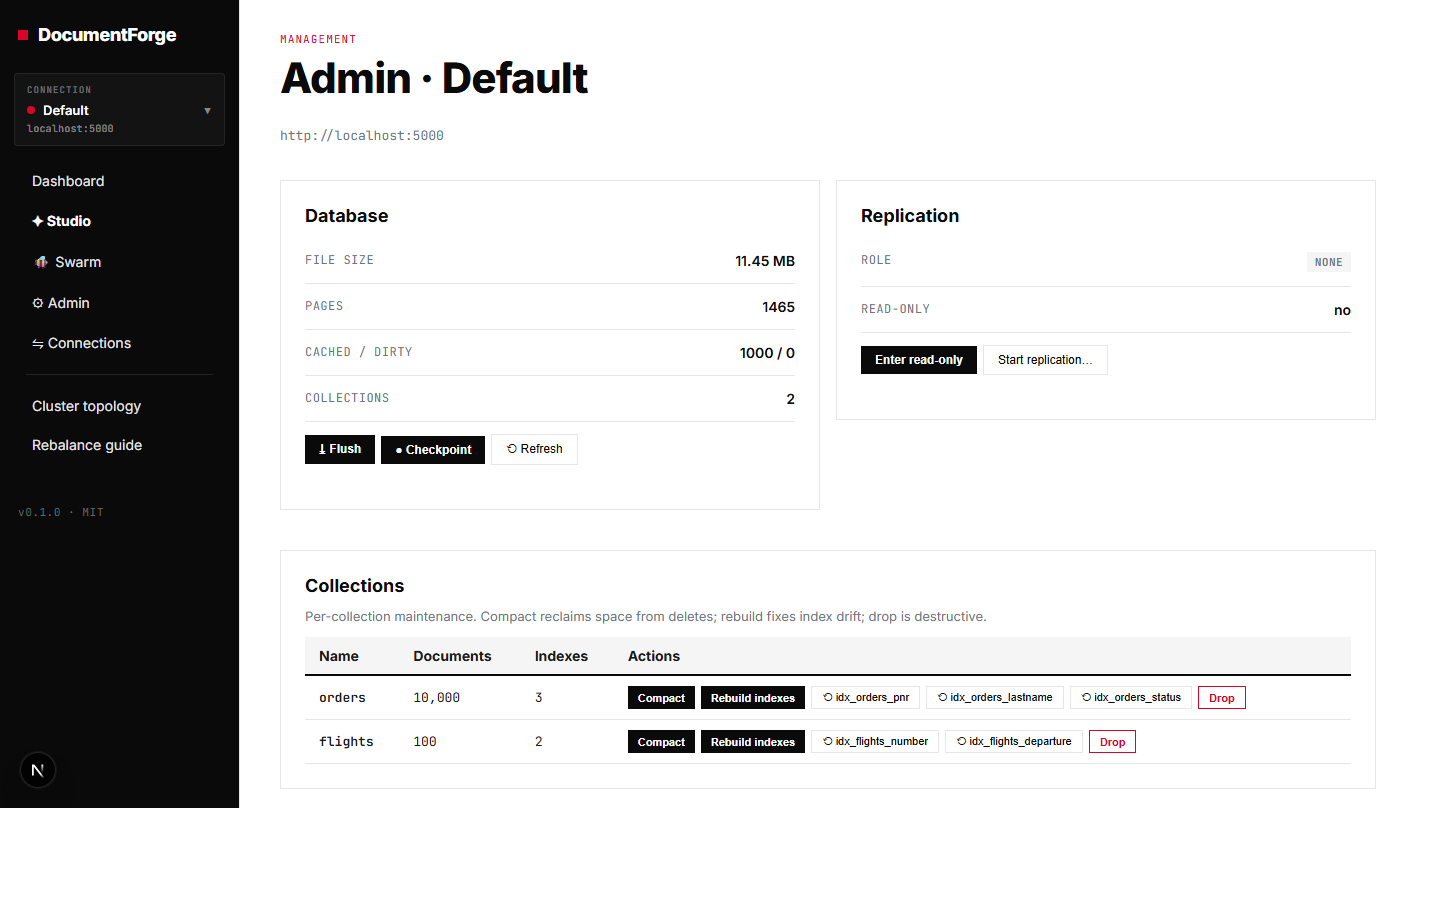
Admin — per-node maintenance
The page where you do the things you don't want a CLI for. File-size and page-cache stats up top. Replication role and read/write toggles beside them. A per-collection table for compaction, full index rebuild, single-index rebuild, and (with confirmation) collection drop.
Cluster builder — design a cluster by dragging boxes
The Topology page is one unified canvas. Drag a cluster, a service, or a database onto it; wire two databases together to set up replication; drag a cluster onto a database to claim it as a shard. Live services carry a green health dot, conceptual ones you're still sketching show grey. The canvas writes the router cluster.json for you — the same file dfdb router, dfdb health, and dfdb rebalance read — and can spawn the router right from the page.
cluster.json the router runs. Full picture in the sharding docs.Rebalance guide
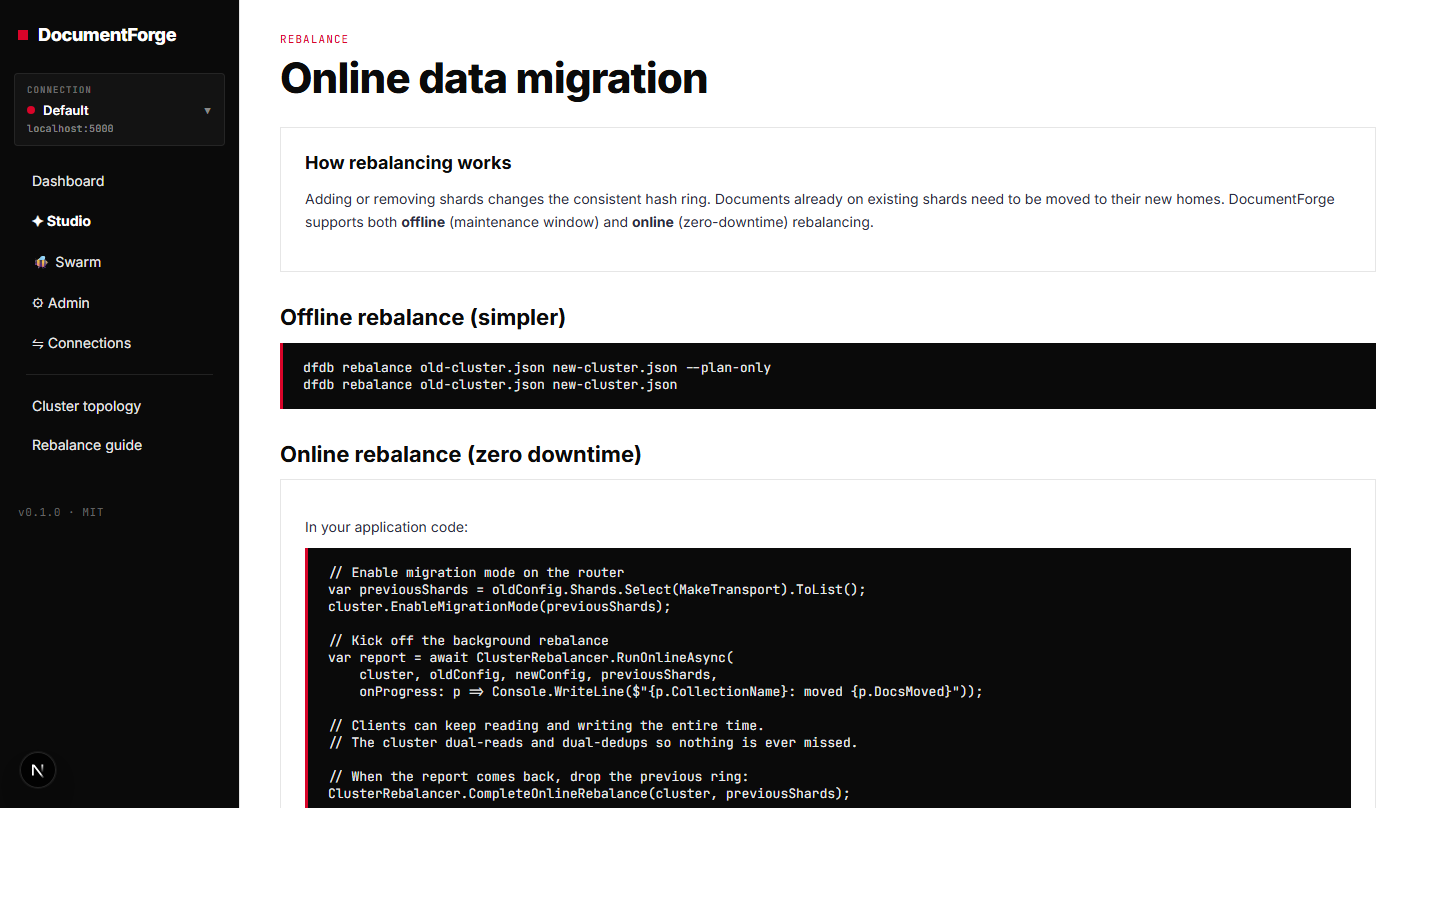
Adding or removing shards changes the consistent hash ring — documents already on existing shards have to move to their new homes. The rebalance page walks you through both options: a maintenance-window offline rebalance (one CLI command) and a zero-downtime online rebalance with an in-process router that dual-reads and dual-dedups while data migrates.
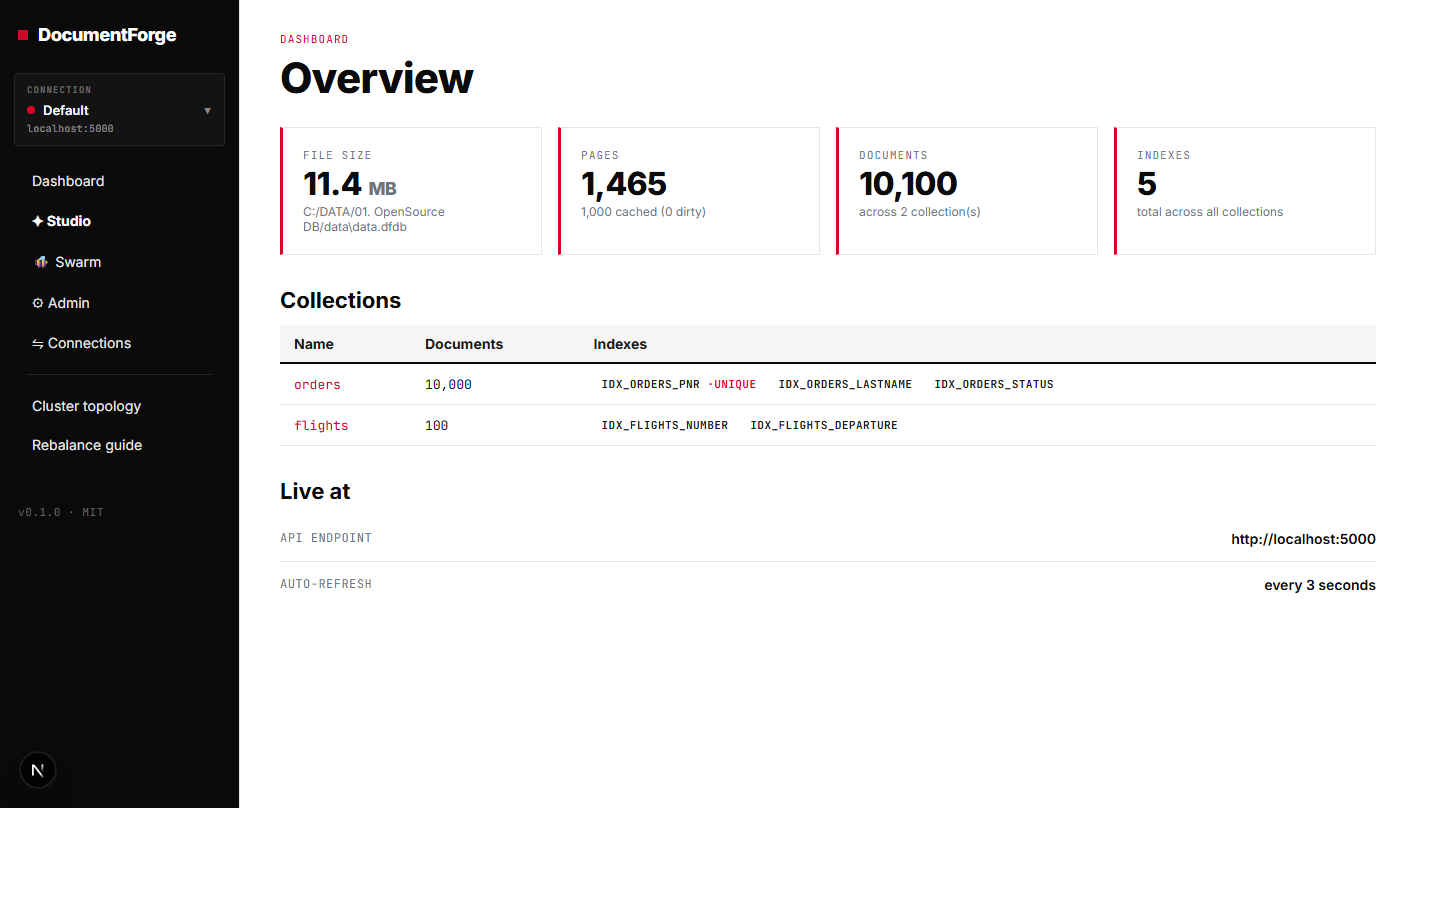
Dashboard — live overview
The page you land on — now a cross-connection overview. Every endpoint you've registered, each with its live FILE SIZE / PAGES / DOCUMENTS / INDEXES and reachability, plus a per-collection summary with named indexes, auto-refreshing every few seconds. One glance tells you the health of your whole fleet.
Run it yourself
The management UI lives in the same repository as the database, in admin-ui/. It's a standard Next.js 15 app — install once, dev forever.
# From the repo root
cd admin-ui
npm install
NEXT_PUBLIC_DFDB_URL=http://localhost:5000 npm run dev
# → http://localhost:3000
You'll need a DocumentForge node running on the URL you set. The simplest one-liner — using the binary you downloaded from the Quickstart:
./dfdb serve --port 5000 --data-dir ./data
Once the UI is up, head to the Connections page and register every other endpoint you operate. From that point on, the sidebar dropdown lets you context-switch between dev, staging, prod-leader, prod-follower, individual shards — the rest of the UI re-points instantly.
npm run build) and serve the output behind any reverse proxy (nginx, Cloudflare, your existing ingress). It speaks only to DocumentForge nodes you've registered, never to a third party.
Why a separate UI?
We had a choice: build a UI into the database, or build it as a separate app that talks to the database over the same REST API everyone else uses. We picked separate, on purpose.
- The database stays a library. No UI assets bloating the binary, no web framework in the dependency graph, no JavaScript runtime to keep patched.
- The UI is replaceable. Don't like ours? Build your own — every action it takes is a documented REST call. We've tested it ourselves: third-party admin tools work fine.
- Multi-environment by default. One UI instance, every endpoint you operate. The model wouldn't work if the UI were embedded.
- Stays out of the data path. If the UI is broken or unreachable, the database keeps serving traffic. The UI is a window, not a load-bearing wall.